
Click, Share, Learn: Ditch the Paper with Seesaw!
- Apr 4, 2025
- 3 min read
by Jaquelyn Portillo, Cooper Elementary
Imagine this: It’s Monday morning, and you have to make last-minute copies for the week. While you are at the copy machine, the worst thing happens…the copy machine jams! There goes your assignment that you had planned for today, but then you remember that Seesaw can save the day!
What is Seesaw?
Seesaw is a digital learning platform designed to help teachers create interactive lessons, streamline communication, and provide personalized feedback—all while significantly reducing paper usage in the classroom.
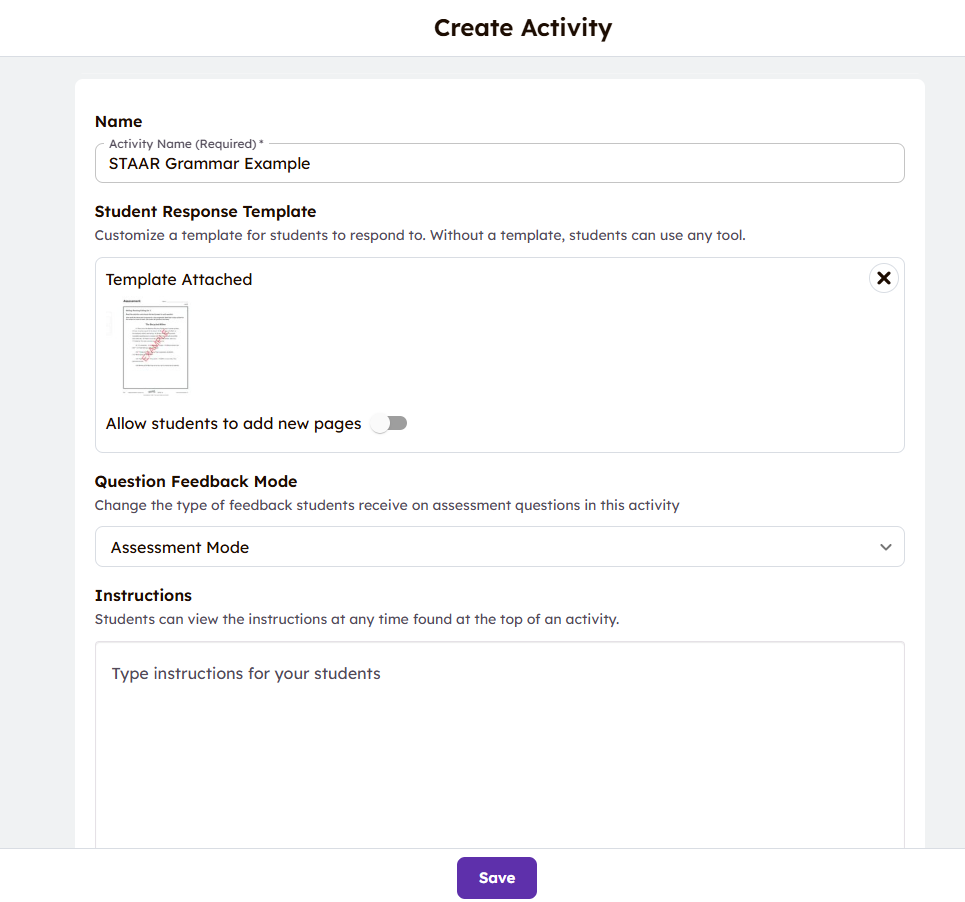
Creating an Activity or Assessment
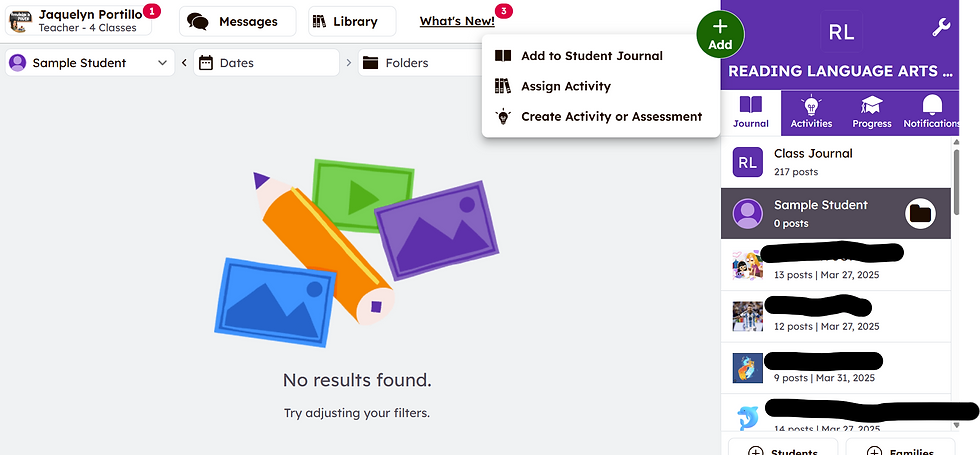
First, make sure that you log in to Seesaw and click the green add button. Make sure to click Create Activity or Assessment to get started creating an assignment.

After clicking Create Activity or Assessment, you must title the activity and type or record instructions for your students. You can also add the standards
to help organize and keep track of assessed TEKS.
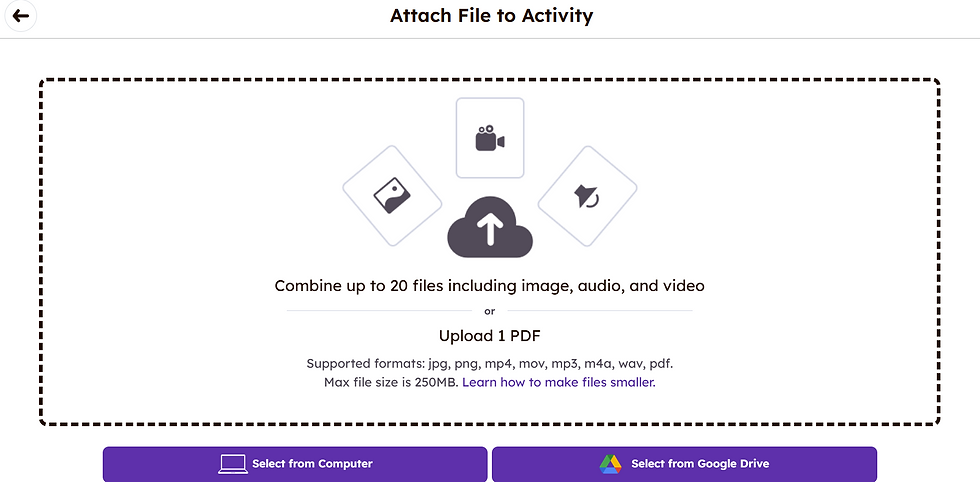
Uploading a PDF
Select the PDF that you would like to upload for this activity. You can upload files from your computer or your Google Drive.
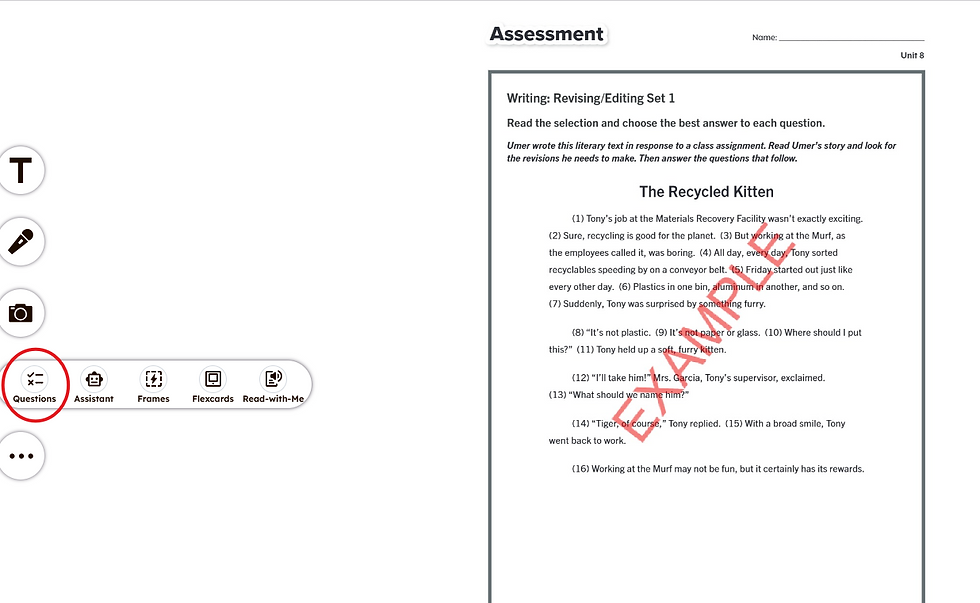
Creating a question
To create a question, you can use the check mark that is circled in the image below. There are multiple options to choose from when creating your questions.

To create a multiple-choice question, you will click on the questions option.
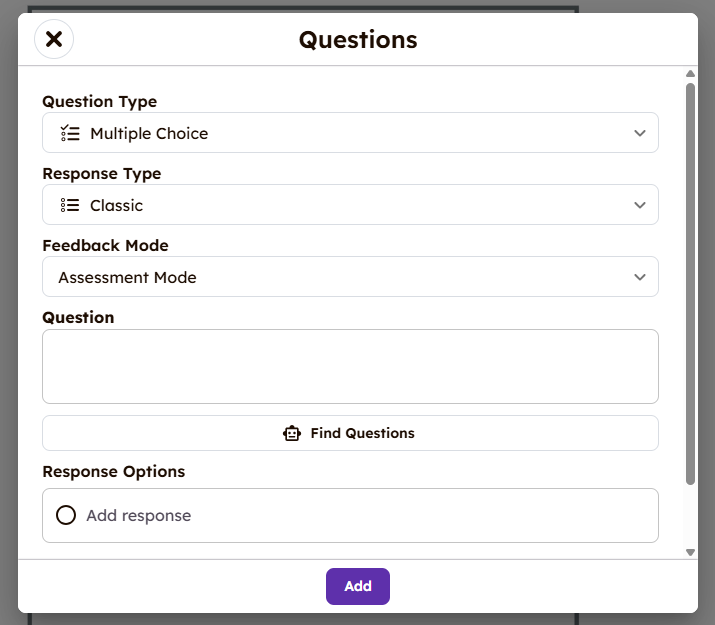
Here you will have select what type of question you would like to create:
You can choose from Multiple choice, True or False, Poll, Short Answer, open-ended, or Reading Fluency.
You will also select the Response Type (classic or drag and drop).
The Feedback Mode lets you decide if you want to create this question in Practice Mode or Assessment Mode.
The Question text box is where you will type out the question that you want to students to answer.
Lastly, the Response Options is where you will insert the answer choices and select the correct answer. Seesaw will auto-grade questions after students respond.
You can add as many questions as you would like on one page, or you could add another page to create another question. I feel that creating the next question on another page helps students focus on one question at a time.
Assigning the activity to students
Once you are done creating the activity and ready to assign it to students, you must click the green check mark to save the activity that you have created. It will prompt you to go to a directions page to finalize the assignment. You can clarify instructions at this time.

Once you click save, make sure to click the purple Assign button to choose the sections that you would like to assign this activity to. During this step, you will select the start and due date of the activity, and you can choose if you want selected students to complete the assignment.

Final Thoughts
This would be a great tool to use in all content areas and across grade levels. Seesaw can be used from Pre-K up to high school. I use it with my stations, exit tickets, and, most recently, with STAAR prep.
Creating assignments has never been easier, allowing you to save time that would otherwise be spent at the copy machine. I highly encourage you to take some time to explore Seesaw and the wonderful features that it has to offer.
